Growing Roses From Seed, Growing Your Own Types Of Roses
Growing roses from seed is easy and great fun with our easy to follow guide to growing your very own different types of roses that will be distinct to your garden.
Rose Gardening Tips and Advice, Growing your own types of roses
Roses in general have received a bad reputation as being difficult to look after and the whole process of gardening and caring for roses deters a lot of people from even trying to grow roses.
As with many things associated with gardening a little planning and preparation goes a long way and the rewards far outweigh any effort you might need to put in.
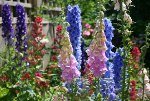
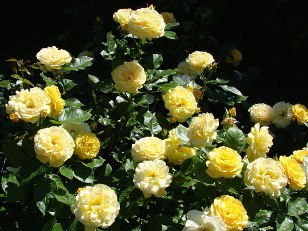
The great thing about growing roses from seed is the fact that you never quite know what type of rose you are going to end up with. There are often some very odd results and it is this very fact that makes the process so appealing. Roses grown from seed are far more likely to be different than most other types of roses. These can be roses that add a distinct visual appeal to your garden and of course there is also a good story attached to it.
How To Grow Roses From Seed
You can choose two different types of roses or you can choose two different varieties of roses from the same rose types.

The seed parent acts as the female. This will be fertilized to produce the seeds. The pollen parent acts as the male providing the pollen to the female for fertilization
Plant your two roses for growing from seed into separate 9 inch pots. Put these in a cold frame or cold greenhouse in February. Late May or early June is the time for the next stage in growing roses from seed. This is referred to as the pollination process. Gently remove all the petals from a half open flower on the chosen seed parent. Remove all the antlers and place a small clear plastic bag over the remains of the flower and gently tie it closed around the stem. The next step in the process occurs the next day and is known as pollination day. Remove a flower from your chosen pollen parent rose.Remove all petals. Remove the bag from the seed parent. Now brush the antlers of the pollen parent off the stigmas of the seed parent. This is transferring the pollen. Replace the bag over the seed parent. If you are feeling confident and want to try to grow a lot of roses from seed it is a good idea to label them with details of the specific rose types used. Leave the seed parent (bag) for a few weeks until early autumn. At this time the rose will have had time to grow 'hips'. These hips will be full of seeds. Now remove the hips and put them deep under compost in a pot. Label the pot and leave outdoors for the winter. In February bring in the hips and get a bowl of water and squeeze the seeds from inside the hips into the water. Some seeds will float, some will not. You need the seeds that do not float. These are the fertile seeds.Get rid of the seed that do float, these are not of use to you. Using specially formulated compost for seeds and cuttings gently place the seeds a little under the surface of the compost. As soon as the first true leaves appear move each one to a pot of its own. It won't be long until some blooms appear. Some will produce blooms others will not. This is now the time for choosing which roses you want to continue growing and which you don't.Continue growing your roses as container grown roses until the following season. Next season you will have the choice of continuing to grow your roses as normal or to bud them onto rootstocks in July. Growing roses from seed can be a little bit of a lottery but well worth trying.